Your cart

Creating a Seamless Check-In Experience with RFID Technology

Creating a Seamless Check-In Experience with RFID Technology

RFID for Seamless Check-In: A Practical Guide for Global Events

The first minutes at the entrance shape the mood of the entire event. When the process feels fast and clear, guests become calmer and more open to engaging with the program, exhibitors, and sponsors. RFID technology plays an important role here. With its support, entry flows smoothly, lines shorten, and both safety and data accuracy improve.

At a Glance

In this guide, you’ll learn how RFID works in check-in, the hardware and software required, and how to design a flow that feels simple for guests and staff. It also covers privacy, standards, typical costs, and the steps from pre-event preparation through exit.

The goal is a check-in process that is quick, safe, and reliable, using proven methods that suit both small gatherings and large international events.

Why RFID Matters in Check-In

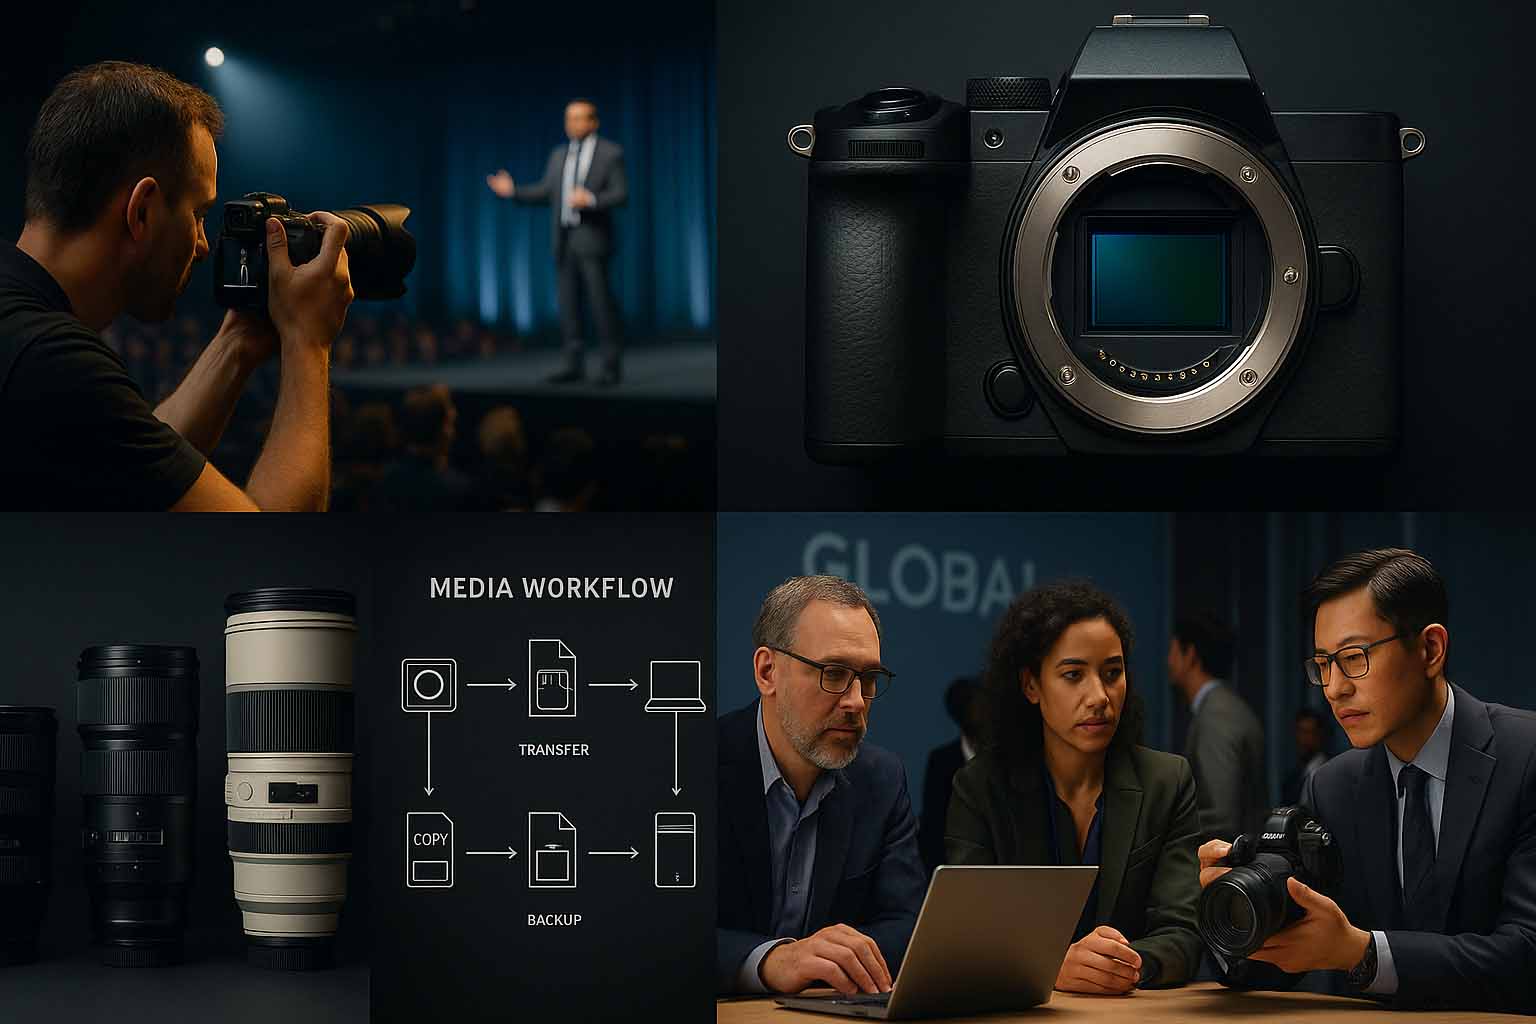
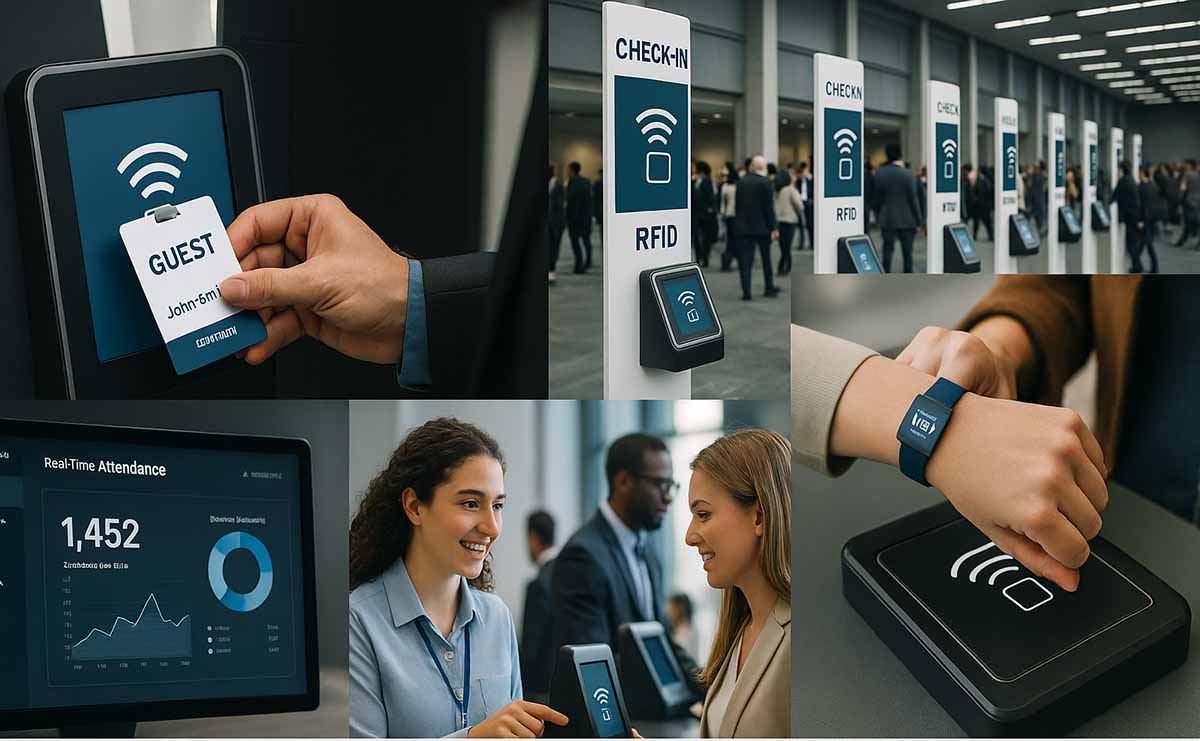
RFID, or radio frequency identification, uses radio waves to read a tag attached to a badge or wristband. Unlike QR codes or barcodes, which need exact alignment, RFID works even if the badge is in a pocket. This makes gate entry faster. At trade shows, concerts, sports events, and conferences, RFID helps thousands of guests enter within minutes.

The data captured also becomes more accurate. Each time a guest passes a reader, the system records the timestamp and location. This information supports crowd management and later reporting. For sponsors and exhibitors, it provides clear attendance figures and reveals which venue areas attracted the most visitors.

How RFID Works at Different Levels

Two main types are used for check-in:

  • HF and NFC at 13.56 MHz: Short range, only a few centimeters. Best for tap-style access at kiosks or turnstiles. Compliant with ISO 14443.
  • UHF at 860–960 MHz: Longer range, from half a meter up to several meters, depending on the antenna and reader. Usually follows ISO/IEC 18000-6C or EPC Gen2.

For large crowds that need faster flow across several lanes, UHF is ideal. If deliberate tap access is preferred, HF or NFC offers better control. Some events use both. For example, UHF portals for general entry and NFC cards for VIP lounges with stricter access.

Designing a Guest-Friendly Check-In

Pre-Event: From Registration to Credentials

Online registration should prepare fields for encoding. Decide the credential type: PVC badge with inlay, Tyvek or fabric wristband with tags, or NFC-enabled cards. Encode the tag ID and link it with the guest’s profile in the event system. If badges are mailed before the event, add clear instructions on how to wear them and which entry gate to use.

Event Day: Smooth Entry Flow

Organize lanes by ticket type: pre-registered, on-site registration, and VIP. Add visible floor decals and overhead signs. With UHF portals, position antennas at the right height and angle for easy reading. For NFC, mark the tap point clearly. When the light turns green with a soft chime, guests continue. If the red light shows, they are guided to a help lane. These cues reduce stress and keep lines moving calmly.

In-Venue Access and Crowd Flow

Place checkpoints in zones such as breakout rooms, backstage areas, or sponsor suites. These help balance movement and increase safety. If session access changes, push updates directly to the badge profile in the database. Guests keep their same cards, and readers detect the new permissions instantly.

Exit Tracking and Re-Entry

If re-entry is allowed, set up two-way antenna systems to separate entry and exit reads. Use shielding and power adjustments to avoid false signals outside lanes. Clean, accurate data ensures correct headcounts and supports solid emergency planning.

Hardware and Software Considerations

Credentials

Match the credential type to the event. Paper badges with UHF inlay are light and affordable. Fabric wristbands suit festivals and multi-day events. NFC cards feel familiar to guests who already use tap-to-pay systems. For badge holders with metal parts, use on-metal friendly inlays to maintain reliability.

Readers and Antennas

Fixed UHF readers often use two to four antennas per lane. Shape coverage areas carefully to avoid overlap with nearby lanes. For NFC, one reader per turnstile or kiosk usually works well. Keep handheld readers available for roaming support and troubleshooting.

Encoding and Printing

When producing badges, printers with encoders allow for on-site issuance. Validate each badge after encoding to avoid unlinked tags. Maintain a test deck to check system readiness each morning before entry starts.

Event System and Integration

Readers must connect to the registration database through API or middleware. Real-time streams allow live dashboards. Local caching ensures reads continue even during internet outages. When the connection returns, all offline reads automatically sync.

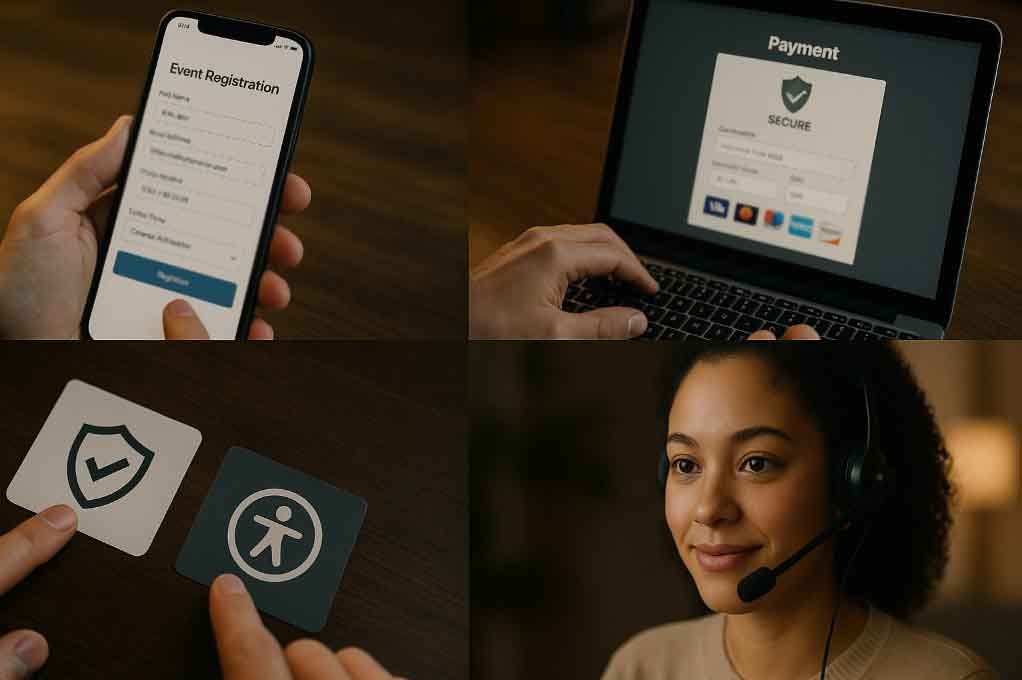
Privacy, Security, and Accountability

Plan for data protection from the start. Store personal information only on secure servers. Limit tag memory to unique IDs, linking other details only in the backend. Apply role-based access for admin tools and keep audit logs.

Guests should also be informed. A brief note on the registration page and event signage is enough. It explains how RFID is used and assures data protection. Follow regional privacy laws, such as European regulations. Provide a contact point for requests related to data access.

Standards and Regulations

Align with international standards. For UHF, ISO/IEC 18000-6C and EPC Gen2 are common. For NFC, ISO 14443 applies. Always verify the frequency and power rules of the event location, since they vary by country. Partner with venues and local suppliers to confirm compliance and correct antenna setup.

Real-World Scenarios

At large expos, RFID lanes move high volumes without chaos. For instance, a regional tech fair installed four UHF lanes and two help lanes. Within the first hour, lines moved quickly since badges did not need precise scanning. At a concert tour, NFC managed entrances while UHF handled merchandise pick-up, allowing two separate flows. The quiet reader sounds kept the atmosphere calm.

Key Performance Metrics

  • Throughput per lane per minute to track speed
  • First-scan success rate to measure accuracy
  • Average wait time during peak and off-peak hours
  • Help-desk deflection rate to check how many guests solved issues at the gate without manual help

Preparation Timeline

Days 0–30: Design and Selection

Set goals such as guest numbers, opening times, and venue layout. Select tags and readers. Create a diagram of gates, cabling, and switches. Specify signage and staffing. Choose how to integrate with the registration system.

Days 31–60: Prototyping and Testing

Build a mini-lane in the office. Test antenna placement and power levels. Try badges from different suppliers. Measure success rates with volunteers walking naturally. By the end, finalize your settings.

Days 61–90: Final Prep and Training

Deliver credentials in bulk and encode them. Prepare staff scripts. Run dry tests at the venue. Label each lane and document antenna settings. Prepare spare equipment and emergency kits.

Common Mistakes to Avoid

The first is poor signage. Guests slow down if directions are unclear. The second is interference. Metal near antennas reduces performance. The third is unverified badges. Without checks, tags may lack linked profiles. The fourth is missing offline planning. Without it, internet issues cause delays instead of smooth syncing.

Long-Term Costs and Benefits

In bulk, UHF inlays cost under a dollar. Fabric wristbands and NFC cards cost more but last longer and enhance premium experiences. Fixed readers and antennas require higher upfront costs but are reusable for future events. Overall, staffing hours shrink, entry speeds rise, and satisfaction increases. Sponsors also receive more accurate reports and a clearer return on investment.

Ensuring Quality on Event Day

Operations teams should arrive early. Power on lanes and test systems. Confirm dashboards display live counts. Assign floor captains to monitor lines. Train help-lane staff for quick reprints or re-encoding. At day’s end, export logs, review error codes, and record adjustments for future use.

Scalable Setups for Different Event Sizes

For 1,000 to 2,000 guests, two UHF lanes plus a help lane, or two NFC kiosks with good signage, are enough. For 10,000 to 20,000 guests, prepare six to eight lanes and an express lane for pre-printed badges. For very large events, divide guests by schedule and place checkpoints near main entries to prevent bottlenecks.

Using Data for Smarter Decisions

Event data becomes a valuable tool when applied carefully. Track hourly entry peaks, compare wait times daily, and review which lanes perform best. Link entry timing with session attendance to improve future agendas. If lines build before a popular talk, open extra lanes and add staff the following day. These adjustments create smoother guest experiences and increase sponsor value.

Accessibility and Inclusion

Not all guests are comfortable with technical check-in. Provide a quiet help lane and step-by-step guides with images. Offer manual options like QR codes or printed lists for rare faulty tags. Train staff to support visitors with assistive devices. Visible support lowers stress and builds trust.

Looking Ahead with Care

RFID continues to improve. Antennas become more sensitive, and software filters get smarter. RFID may also combine with technologies like BLE or computer vision if the venue and budget allow. Even with new tools, the foundation remains the same: clear flow, reliable hardware, thoughtful integration, and strong privacy practices.

Final Message

Smooth check-in is the product of planning, the right RFID tools, and disciplined testing. When the entry process no longer acts as a barrier, guests have more time to focus on the real purpose of attending. This is how meaningful experiences take shape for everyone.

A Guide to Securing Sponsorships for Large-Scale Events

A Guide to Securing Sponsorships for Large-Scale Events

Guide to Securing Sponsorships for Large-Scale Events

Large-scale events go beyond the stage, lighting, and program. Often, success depends on securing partners willing to invest in exchange for clear value. For organizers and brands worldwide, strong sponsorships create broader reach and smoother production.

Whether you are organizing a tech conference in Singapore, a music festival in Berlin, or a sustainability summit in São Paulo, sponsors share the same question: What do we gain in return for our investment? When the answer is clear and backed by data, approval comes faster.

Quick Summary

  • Focus your offer on ROI, audience fit, and brand reputation security.
  • Prepare an asset inventory before proposing: audience data, rights, and channels.
  • Price based on actual value, not just costs.
  • Measure and report results simply, accurately, and promptly.

Why Strong Sponsorship Matters

Expenses for venue, production, security, and talent are significant. Ticket sales and exhibitor fees often fall short, making sponsors critical partners. In the global market, brands look for spaces where their target audience is present. If you can show audience size, quality, and value before, during, and after the event, the partnership becomes a logical choice.

Operationally, sponsors can elevate attendee experiences. A telecom company might provide high-speed Wi-Fi along with a co-branded portal. A fintech partner could enable cashless payments on-site. Every activity should have clear objectives and measurable outcomes.

What Sponsors Seek Across Regions

While markets vary, core criteria remain consistent.

First, audience fit. Who will attend, and what decision-making power do they have?

Second, quality of visibility before, during, and after the event.

Third, measurable outcomes that help track impact on leads, sales pipeline, or brand health.

Brand safety is equally critical. Establish clear policies for content and booth conduct, including influencer activities. If certain countries have restrictions, address data protection and advertising compliance. This demonstrates that your team meets global standards and values a positive reputation.

Building a Sponsorship Asset Inventory

Before setting prices, list what you can offer.

  • Audience data and access: size, profile, countries, interests, and touchpoints such as email lists and app users.
  • On-site and online visibility: banner placements, LED screens, stage mentions, livestream lower thirds, and branded content in the agenda or newsletter.
  • Naming rights: presenting partner, track naming, lounge naming, or program segment naming.

Create a matrix for each asset, showing reach, estimated impressions, cost to deliver, and any limits. This helps prevent overpromising and provides a basis for pricing. If you have your own media like a podcast or video series, include it as an extension for continued exposure beyond event week.

Designing a Clear Offer

With your inventory complete, prepare an offer that even a busy procurement manager can grasp quickly. Use a one-page snapshot with the event overview, audience highlights, key packages, and contact details. Keep paragraphs short, avoid heavy jargon, and use clear visual elements.

Offer tiered packages with distinct levels such as Strategic Partner, Major Partner, and Supporter. For each level, show the core assets, optional add-ons, and expected outcomes. Indicate any partner limits to maintain exclusivity and avoid conflicts of interest.

Pricing Based on Real Value

Do not set prices solely on expenses. Align them with the sponsor’s benefits. For instance, if you have 5,000 senior attendees and the typical conversion rate is two percent, estimate potential leads and link them to the average deal size. This justifies the price logically.

Provide flexible options. Offer a bonus email blast if registrations exceed targets, or a social content boost for high engagement. Show your commitment to achieving goals, and present a clear reporting plan.

Include historical benchmarks from your own events or public case studies. Give ranges rather than fixed targets to set realistic expectations. For new events, use conservative estimates and offer an upside clause if numbers exceed projections. Most procurement teams worldwide appreciate this approach.

Prospecting and Initial Outreach

Create a target brand list by category and region, avoiding conflicts with current partners. Use exhibitor lists from similar events, press releases about new products, and job postings for partnership roles. These sources reveal companies with active budgets and clear needs.

For first contact, a concise email with a clear reason is more effective than a lengthy presentation. Example: “We have a clean tech track that aligns with your sustainability program. Here’s a one-page overview and sample assets.” Provide three date options for a 20-minute call, and follow up with new updates like confirmed speakers or registration milestones.

Customizing the Offer for Each Brand

The core offer remains the same, but details adapt to each brand. Sports apparel companies may prefer on-site experiences and community runs, while B2B software brands may value demo lounges and curated meetings. Prepare two or three micro-modules that attach easily to the core package. Approvals come faster when the connection to the sponsor’s campaign is clear.

For example, at a tech summit in Tokyo, a sponsor set up a mentorship booth. The line extended into the main hallway and generated dozens of inbound demo requests within two weeks. This proved that you can deliver tangible results, not just visibility.

Negotiation and Agreement

List deliverables, dates, and responsible parties. Define category exclusivity if needed, and set up content approvals, co-marketing schedules, and creative specifications. Structure payments with a deposit, pre-event milestone, and post-event balance tied to delivery. Avoid vague terms to reduce risks.

Ensure compliance. Some countries regulate alcohol, fintech, or health claims. Outline data protection measures and cross-border transfers. Prepare cancellation and contingency plans. Sponsors gain confidence when there are clear backup strategies.

Activation and Attendee Experience

To make your sponsor’s brand memorable, give attendees a reason to engage. Create interactive zones, workshop tables, and photo areas with clear calls to action. Adapt activities to local culture while staying true to global brand guidelines. In Dubai, a VIP lounge with quick consultations may work well, while in Barcelona, a lively live demo in an open plaza might be ideal.

Plan staff training and the run of show. Ensure cue sheets and escalation paths are ready, and keep a small crisis kit with USB backups, extension cords, and a printed contact list. Smooth operations are often the sponsor’s primary reason for renewing the partnership.

Measuring and Reporting Results

Set metrics before promotion begins. These can include registration targets, qualified meetings, scan counts, or media reach. Use UTM codes, unique QR links, and lead forms with clear consent. Assign someone to monitor data quality during the event.

In your report, show performance against targets, key takeaways, and creative proof like photos and highlight clips. Keep the document concise, with an annex for raw data. Offer a 30-minute review call to discuss next steps.

Building Long-Term Relationships

Future sales are easier when current partnerships are nurtured. Send quarterly updates on community growth and content performance, and suggest co-created projects like research briefs or regional roundtables. If your event is expanding, offer current sponsors first rights of renewal.

Be honest about shortcomings. If an asset was not delivered on time, provide a clear and valuable replacement. Brands value integrity and accountability.

Pre-Proposal Checklist

Before hitting send, confirm that audience data and current registration numbers are complete. Check if the creative and approval timelines are set. Ensure category exclusivity is clear. Verify that assets align with the brand’s objectives. If all these are in place, your proposal is more likely to get a positive response.

Securing sponsors for large-scale events requires clear value, thorough preparation, and honest relationships. By demonstrating real benefits and delivering effectively, brands will return, and your projects will grow across different regions of the world.

Understanding Cultural Considerations in International Conferences

Understanding Cultural Considerations in International Conferences

Understanding Culture in Global Conferences: A Guide for Thoughtful Planning

Global conferences go beyond discussions on technology, security, fintech, AI, or sustainability. They bring together people from diverse backgrounds, languages, rituals, and perspectives. Without careful planning, it’s easy to make mistakes in tone, agenda, or even in simple greetings. With proper preparation, trust deepens, conversations become more enjoyable, and agreements grow stronger.

Overview

Culture influences every detail of a conference from invitations and greetings to meals, session schedules, stage interactions, and follow-ups. Clear flow, understandable language, and respect for others’ beliefs create a safe and productive environment.

Early research, collaboration with local advisors, and staff training help build cultural understanding. When participants feel heard and valued, they are more open to sharing ideas and working together for genuine progress.

Why Culturally Sensitive Design Matters

A conference is like a small city with its own timing, rules, and ways of interacting. Expectations differ among attendees from East Asia, the Middle East, or Latin America. Question styles also vary between delegates from Northern Europe and West Africa. Treating all styles as the same may silence some voices. Providing space for varied participation ensures fairer engagement.

Consider a panel in Tokyo, where attendees may prefer quiet reflection before speaking. If the session is short and fast-paced, their contributions may be reduced. In contrast, São Paulo may have lively exchanges with rapid idea sharing. A moderator prepared for both styles will uncover more valuable points.

Building an Agenda that Respects Different Customs

Time also has cultural meaning. Some countries value punctuality, while others are more flexible. To be fair, add clear buffers between sessions. Avoid scheduling during important prayer times or traditional dinners. In some Middle Eastern cities, evenings are preferred for select events. In parts of Europe, work ends early for dinner. In South Asia, lunch may be longer when rituals are involved.

For hybrid formats, keep time zones in mind. Create shorter live blocks for multiple regions and provide other content on demand. If a keynote speaker joins from another continent, offer alternative Q&A times via an in-app thread or small huddle rooms.

Language, Interpreting, and Visual Cues

Simultaneous interpreting is ineffective if microphones are unclear, slides are cluttered, or speakers rush. Give speakers clear guidelines on pacing, vocabulary, and avoiding jargon. Provide glossaries for technical terms. If discussing cybersecurity or AI safety, have the moderator clarify how terms will be used. Visual cues should be easy to read with large fonts, clear contrasts, and simple layouts.

Names and titles also matter. Some cultures list the surname first, while others prefer first names. Brief hosts and emcees on correct pronunciation. Small details like this show respect.

Food, Religion, and Sensitive Beliefs

Buffets are common, but clear labeling is better. Separate halal, kosher, vegetarian, vegan, and allergen-friendly options. Assign utensils for each section. Avoid sauces with undisclosed ingredients. In some cultures, certain meats are unacceptable; in others, alcohol is prohibited. A simple card explaining the origin and preparation of dishes can ease concerns.

Provide a quiet room for prayer or personal breaks. Small signs outlining space guidelines help make guests feel comfortable knowing there’s a place for their rituals.

Communication Onstage and Beyond

Question styles vary. Some countries prefer direct exchanges; others pause before responding. Instruct moderators to find balance and set brief rules at the start. One concise question per person, no personal attacks, and focus on ideas rather than individuals.

Outside sessions, communicate through polite and clear emails or app messages. Avoid slang that may have different meanings elsewhere. Use standard greetings and clear subject lines. For serious issues, escalate with neutral language and clear deadlines.

Respecting Hierarchy and Decision-Making

In some cultures, seniority carries more weight, making junior staff hesitant to speak. In others, feedback is more equal and quick. Ensure all voices are heard through round-robin Q&A or smaller breakout discussions. For agreements requiring signatures, understand formal processes, as some organizations need legal clearance before making official statements.

Designing Inclusive Stages

The stage reflects the value of a conference. Panels representing only one region provide an incomplete picture. Aim for diversity in gender, geography, profession, and organization type. In a Berlin forum on digital ethics, discussions were richer when regulators, startup founders, data scientists, and civic leaders all spoke.

Stories from the Field

At a Dubai summit, confusion arose when Carlos Eduardo Silva was introduced simply as Carlos Silva. The delegate felt disrespected since middle names honor family. The emcee quickly adjusted, reading full names thereafter, improving the atmosphere.

In a Copenhagen workshop on privacy, East Asian participants were initially silent. The facilitator introduced two minutes of quiet thinking before open discussion, leading to more ideas being shared.

Technology Layer: Hybrid, Accessibility, and Data Ethics

Hybrid events require more than cameras and screens. Ensure clear audio, captions, and stable connections. Offer live captions in the main language and subtitles for secondary ones. Make events accessible with alt text in apps and venues equipped with ramps, elevators, and quiet spaces.

When collecting data, state its purpose clearly. Obtain consent for facial recognition or analytics, and offer opt-outs for recordings. Publish privacy policies and data retention timelines to build trust.

Engaging with the Local Community

Treat the host city as a partner. Work with cultural advisors to identify sensitive symbols or colors for stage design. Some color combinations carry meaning. In certain places, greetings may include small gifts. For city tours, share dress guidelines for sacred sites. Choose community partners with fair practices and ethical standards.

Networking and Business Card Etiquette

In some cultures, business cards are given with both hands and examined before being put away; in others, it’s casual. Train staff to follow the guest’s custom. Never write on a card in front of its giver. For digital exchanges, ensure QR codes work offline. Provide small tables with sanitizer and pens for those wanting to take notes.

Crisis and Sensitive Topics

Regions may face conflict or disasters during events. Prepare neutral and respectful statements. Avoid symbols or colors with political meanings. Allow affected participants to opt out of photos or videos. Set up help desks for travel changes and licensed mental health support. Calm communication helps during difficult times.

Measuring Success with Cultural Awareness

Attendance numbers are not enough. Measure participation quality. Ask in surveys whether attendees felt safe, heard, and respected. Use clear scales, such as one to five points, and provide space for suggestions. Translate surveys locally and address critical feedback within a set timeframe. Share improvements in future editions.

Building a Culturally Aware Team

The team is the conference’s heart. Offer short courses on cultural differences. Rehearse scripts for emcees and moderators. Role-play difficult situations such as greeting guests who avoid handshakes or stopping speakers who exceed time limits politely. Practice makes responses more natural.

Limited Bullets: Essential Task Checklist

  • Appoint a cultural advisor for all planning stages
  • Prepare clear policies on language, names, and Q&A
  • Ensure food, timing, and spaces align with beliefs and rituals
  • Set privacy, accessibility, and hybrid standards before the event

Creating a Welcoming Atmosphere

Small gestures matter. Use readable signage, smiling volunteers, attentive moderators, accessible stages, and quiet corners for rest. These elements communicate that the conference is for everyone.

A clear code of conduct should be visible at registration, in the app, and around the venue. Explain how to report issues and commit to action. Trust encourages participants to collaborate more openly.

Culturally Respectful Follow-Up

After the event, send thank-you letters in participants’ preferred languages. Offer email language options. Share timelines for releasing videos, publishing materials, and posting feedback reports. Provide a page compiling key lessons and session links. Some countries value certificates of attendance, while others prioritize access to materials and contacts.

Brief Look at Communication Styles

Communication can be direct or indirect, fast or slow, high context or low context. High context relies on gestures and tone, while low context focuses on precise words. Understanding these styles helps facilitators time questions and responses effectively.

For example, at a Toronto AI governance panel, a Nordic regulator spoke briefly yet sharply, while a Latin American founder offered energetic detail. The moderator allowed varied answer lengths and used visible timecards to manage flow.

How to Start with a New Team

Begin with a Cultural Playbook outlining rules on names, greetings, timing, language, food, and conduct, with examples for each. Assign cultural champions to each track as primary contacts for questions. Budget for interpreting, captioning, and accessibility, ensuring these are not cut first. Test guidelines in pilot sessions before the main event.

Looking Ahead

Cross-border projects in AI, fintech, and climate tech are growing, bringing more cultures together. New generations are more digital and experimental, while some attendees still prefer traditional formats. Clear design and respect ensure that everyone sees the conference’s value. This is not optional for it is the foundation for meaningful results.

The long-term success of global conferences depends on respect for people. With clear language, mindful scheduling, space for rituals, and balanced representation, discussions become richer. Such an environment fosters trust and genuine global collaboration.

Choosing the Right Camera for Event Coverage

Choosing the Right Camera for Event Coverage

Selecting a camera for large events shapes every story you share with the world. The shooter controls the moment, but the camera body, lens, and workflow can make production smooth or slow. At conferences, expos, trade shows, galas, and launches in different cities, lighting and pace change within seconds. With the right gear, the brand message stays clear and the audience remains engaged.

Quick Content Summary

This guide outlines the key factors in choosing a camera for event coverage in the global market. It discusses sensor size, autofocus, video features, low-light performance, lens options, and field durability.

It also includes advice on media and connectivity for fast delivery, a brief comparison of mirrorless and DSLR systems, practical examples from different cities, and a clear reminder for making better choices.

Why the Camera Matters in Event Coverage

Events are live. There is no second take for stage lighting, leader handshakes, or the turnout of thousands of guests. If focus fails or the body overheats, the story suffers and costs rise. A system must run for long periods, switch from photo to video instantly, and produce files ready for quick processing. In many countries, clients expect highlights within an hour. The right camera reduces stress and improves output quality.

Types of Cameras and Their Strengths

Teams worldwide often choose between mirrorless, DSLR, and cinema cameras. Mirrorless units are lightweight, have fast autofocus, and feature silent shutters ideal for award segments and panel discussions. DSLRs remain popular for their durability and wide pre-owned lens availability. Cinema cameras excel when professional codecs, multiple connections, and long rolling times are needed for master feeds.

Many crews combine systems. A mirrorless body may handle photos and hybrid clips, while a cinema unit covers keynote wides and the main program. The key is assigning clear roles for each unit before the event begins.

Sensor Size and Its Impact

Full-frame sensors perform well in low light and offer shallow depth of field. APS-C sensors are lighter and provide extra reach for stage coverage without extremely long lenses. Micro Four Thirds systems feature compact lens line-ups and strong stabilization.

Choose based on the venue. Large halls benefit from crop bodies to extend the reach of a 70–200mm lens, while dim ballrooms favor larger sensors. Remember that higher resolution means larger file sizes and longer processing times.

Autofocus and Real-World Movement

Events move fast, and speakers won’t repeat their actions. Fast, accurate autofocus with subject tracking and eye detection is essential. Test performance on backlit stages and in dim expo corners. Many bodies offer blackout-free views and high burst rates, helpful for ribbon cuttings and award moments. In quiet segments, electronic shutters prevent distraction.

For long movements such as entrance walks, plan focal lengths and movement paths. If gimbals are not allowed among the audience, use a monopod and steady breathing to achieve smoother shots.

Video Features for Live and Post Production

Live streaming and post-produced content have different requirements. For live, look for clean HDMI or SDI outputs, long record limits, and stable external power options. For post, prioritize 4K or higher resolution, 10-bit recording, and log profiles for greater color grading flexibility.

Watch for rolling shutter effects, especially during fast pans across LED walls. In-body stabilization and proper rigging help when moving quickly between stage, breakout rooms, and media lounges. For multi-camera setups, sync with timecode or use a clap and slate at each segment start.

Low Light and Dynamic Range

Venue lighting varies greatly. Stages may be bright while the audience remains dim. Choose a body with clean high ISO performance and enough dynamic range to avoid blown highlights. Dual native ISO makes switching from keynote to evening networking easier.

Lens choice is equally critical. Fast primes excel in portraits and sponsor booths, while bright zooms handle mixed lighting. In cities like Berlin or Dubai, setup time may be short, so a body that delivers clean files in minimal light is invaluable.

Lens Ecosystem and Budget Planning

A system is incomplete without the right lenses. Three core types are essential: wide for venue and crowd shots, standard zoom for general scenes, and telephoto for stage coverage. Add a fast prime for portraits and low-light conditions.

In global productions, consider rental availability in cities like New York, Tokyo, London, and Dubai. Choose mounts with a broad lens selection, both new and pre-owned. Include accessories like variable NDs, circular polarizers, and sturdy lens hoods. In your budget, factor in insurance and maintenance alongside the body cost.

Media, Connectivity, and Workflow

Cards, file systems, and transfer speeds are critical. Check the bitrate and format you plan to use. For 4K 10-bit recording, you’ll need high write-speed cards with reliable controllers. Dual card slots allow simultaneous backups.

Create a client-appropriate file naming system, such as YYYYMMDD_Event_Session_CamA. For rapid delivery, use wired LAN or stable Wi-Fi to auto-transfer selected shots to the editor. Prepare FTP presets and cloud profiles. Use checksum verification during ingest, and never format cards until two complete copies exist on separate drives.

Power, Battery, and Thermal Management

Event days are long, and venues aren’t always cool. Select a body that’s power-efficient and capable of continuous recording. Carry multiple original or high-quality batteries and a fast charger. For locked-off stage cameras, use dummy batteries with AC power.

Avoid blocking ventilation when using cages. In warm halls, schedule short breaks between long clips. Test the full setup before travel to identify heat or time limits. Bring a small fan if the venue allows.

Reliability and Service Network

Accidents happen. Rain can drench a rig outside a convention center, or an operator might slip in a crowd. Choose a brand with a global service network and quick parts replacement. Check for weather sealing and rated shutter life.

On major projects, each shooter should have two bodies for backup. Schedule firmware updates and test new features before departure. A reliable system may go unnoticed, but it ensures the highlights are delivered on time.

Audio Integration and Stage Feeds

Strong visuals mean little if audio is unclear. In panels and keynotes, sound clarity is the viewer’s first impression. Select cameras with quality preamps and manual level controls.

Carry lavaliers for quick interviews and shotgun mics for ambient or host stand-ups. When accessing a stage feed, find the correct output from the audio console and use an attenuator to prevent clipping. Monitor through headphones and, if possible, add a safety track. For critical messages, have a backup recorder ready.

Color Management and Matching Multiple Bodies

Color shifts are common when mixing cameras and venue lighting. Begin each session with a slate shot including a color chart and white balance card. Log profiles and exposure settings per unit.

During grading, match exposure first, then white balance, and apply creative looks last. For photos, use a neutral preset adaptable to different lights. For video, log profiles work well if grading time is available, while Rec.709 is best for fast turnaround.

Quick Mirrorless vs DSLR Comparison

  • Mirrorless: Fast autofocus and tracking, often lighter, silent shutter for quiet ceremonies
  • DSLR: Familiar handling, wide pre-owned lens market, often very durable
  • Viewfinder and Battery: Optical viewfinders in DSLRs save power, mirrorless offers real-time exposure previews
  • Video: Mirrorless models typically have newer video features, including 10-bit options and broader codec support

Example Setups by Venue and Purpose

For a keynote in a large New York hall, use a full-frame with a 70–200mm for the stage and a second body with a 24–70mm for audience reactions. At a Tokyo trade show, a lightweight APS-C with a 16–55mm works for booth walk-throughs, with a 35mm prime for quick speaker portraits.

For an outdoor Dubai award night, bring a weather-sealed body and stabilized telephoto lens to handle shifting wind and light. In a London press briefing, set one camera as a fixed wide and have another capture close-ups and interactions.

If using a new body, dedicate a day for muscle memory. Assign custom buttons for ISO, white balance, and photo/video switching. Set recall modes for stage, audience reactions, and interviews. On the event day, menus stay simple, movements quick, and the team stays efficient.

The best camera suits the real demands of the event. Evaluate the venue, lighting, subject distance, operation hours, and delivery speed. Match sensor, autofocus, lens, and codec to the plan. Prepare media, connectivity, and backups to avoid mid-program failures.

Allocate time for pre-travel tests and assign clear roles for each unit on event day. Well-planned setups make crews more efficient and stories clearer for audiences worldwide.

Plan the post-event handover as well. Prepare metadata, organize folders, and secure two backups before leaving the venue. With disciplined workflow, approvals come faster, and the content pipeline stays smooth for the next project anywhere in the world.

Securing Event Registrations with Confidence

Securing Event Registrations with Confidence

A successful event begins with a smooth and secure registration process. This is where the trust of attendees, sponsors, and partners is built. A calm, clear registration flow leads to higher form completion, fewer support questions, and earlier insights into actual attendance numbers. If you’re collecting sensitive attendee details, it’s a good idea to generate a strong password to protect your system access. In a global setting where languages, currencies, and data laws vary, carefully designed registration is the bridge between interest and participation.

Quick Summary A seamless registration experience builds trust and increases attendance. This article explains how to simplify forms, secure data, clarify payments, and prevent fraud. It covers mobile-first design, accessibility, system performance, customer support, and how to build long-term trust through transparency and respect for data privacy.

Why Strong Registration Matters Globally

Registration is the first real handshake between your event and its audience. If the experience is smooth, people feel confident sharing their information and making payments. Confusing forms or unclear pricing cause drop-offs. For organizers, accurate registrant data informs plans for the venue, supplies, and agenda. For sponsors and auditors, solid data supports funding and approvals.

Picture a virtual summit with attendees from five continents. Languages, currencies, and time zones vary. A simple, secure, and clear form helps people complete registration quickly. Otherwise, ad spending is wasted, and team time is lost.

Building Trust from the First Click

Start with a clear registration page. Show essential details: date, time with time zone, location or platform link, and a brief agenda overview. Use plain language. Create a layout with good spacing between sections. Avoid lengthy initial forms.

Include short but complete refund and ticket transfer policies. Explain how discount codes work and if limits apply. Show total costs upfront including taxes and fees before final payment. This level of clarity eases concerns and reduces cancellations.

Security at Every Step

Use SSL to encrypt data from start to finish. Choose a trusted payment gateway that follows standards like PCI DSS. Never store full card details on your servers. Apply tokenization and 3D Secure 2 when possible for fraud protection.

Implement rate limits and bot protection. Use modern human verification that doesn’t frustrate users. For free events vulnerable to spam, use email verification or one-time codes. If accounts are required, allow single sign-on from major providers for better safety and ease.

Privacy with Clear Consent

Keep data collection minimal. Ask only for information needed to issue a ticket. Separate consent for marketing from transaction consent. Show how and where data is used. In regions with strict privacy laws, explain how access and deletion requests are handled. Be careful with vendors and ensure clear agreements for data processing.

Smooth Payments Without Barriers

Offer region-appropriate payment methods. Some prefer cards; others use digital wallets. For B2B, include invoice and bank transfer options. Show currencies and estimated conversions. Do not hide taxes or fees. Transparent costs reduce buyer hesitation.

Keep steps brief before issuing a receipt. Avoid repeated data entry. If there’s an error, offer clear messages and easy retries. Upon success, send confirmation and receipt immediately.

Reducing Drop-offs and No-shows

Use progress indicators for long forms. Try progressive profiling: get key info first, then extras like workshop choices. Offer save-and-resume for corporate attendees who need internal approval. Use auto-fill and proper field formats to prevent errors.

After registration, send an email with a calendar file. Include venue maps, session change instructions, and ID requirements. Schedule reminders like two weeks before, three days before, and on the day. For virtual events, share a test link to check audio and connection.

Preventing Fraud and Misuse

Open registration attracts both genuine and suspicious users. Guard against velocity attacks. Flag disposable email domains for review. Limit coupon code use by email or company if needed. For high-ticket items, use thorough verification before issuing badges or QR codes.

For chargebacks, log IP addresses, timestamps, and receipts. Use AVS and CVV if supported. Good records help during disputes.

Accessibility and Inclusion

Registration must serve everyone. Use clear labels and alt text. Ensure color contrast and readable font sizes. Avoid components that screen readers struggle with. Skip strict timeouts unless necessary. Provide a language toggle. Add fields for accessibility or dietary needs if meals are offered.

Mobile-first Experience Design

Many register via phone. Design forms with mobile users in mind. Use proper keyboards for numbers, dates, and email fields. Avoid small buttons. Ensure fast loading, even on slow connections. Test thoroughly across screen sizes to reduce input errors.

Internal Safeguards for Organizers

Security isn’t just external. Within your system, use role-based access. Grant permission only where needed. Log changes to registration lists. Use two-factor authentication for admins. Test in a staging environment before releasing new fields or pricing logic. Maintain regular backups and clear runbooks for emergencies.

Handling Traffic Spikes Smoothly

Traffic surges during announcements. Use content delivery networks and caching for static assets. Set up autoscaling or prepare extra server capacity. For major launches, virtual waiting rooms help prevent crashes. Test the full user flow with load simulations before launch day.

Displaying Credibility and Social Proof

Show confirmed speakers and top partners who’ve approved logo use. Share testimonials only with permission. Publish refund policies and session recording terms. Clear details provide comfort for undecided participants.

Stories from the Field

A tech event in Europe reduced drop-offs by shortening its first page. More users completed the form when personal data wasn’t required upfront. Optional details were collected after payment for matchmaking purposes.

In South America, a sports conference clarified group registration policies. It detailed per-group discounts and added strong manager verification. Misuse dropped and invoice approval sped up.

In Africa, a social forum added SMS reminders along with email. More people joined live sessions thanks to the phone alerts. In Asia, a fintech summit used 3D Secure 2 and manual review for premium tickets. Chargebacks fell without slowing regular payments.

Simple Ticket Pricing Structure

Use clear tiers: standard, student, and corporate. Show what each includes, like workshop access or materials. Avoid overwhelming users with too many options. For early bird rates, show cut-off dates clearly. Mention policies for name transfers or session changes.

For enterprise bulk purchases, offer easy invoicing with clear terms. Share the account manager’s contact for fast questions and approval. Smooth processes help finance teams release funds efficiently.

Using Data for Improvement

Analytics reveal where users drop off. Track page views to form starts, form starts to completion, and completed forms to successful payment. Monitor refund and chargeback rates. Use privacy-conscious tracking with clear user consent. Keep A/B tests simple and goal-driven.

Review support queries. If people ask about time zones repeatedly, reposition that info. If address errors occur often, improve field instructions.

Seamless System Integrations

Connect smoothly with your CRM, email tool, and event app. Proper integrations reduce manual work and errors. Set up clear field mapping and sync rules. For waitlists, send invites automatically when seats open. Sync QR codes securely and on time for badge systems.

Reassuring Customer Service

Offer clear support channels: email, chat, or phone. Share response hours. Build an easy-to-read knowledge base. Provide templates for refunds, transfers, and receipts. If delays or issues arise, send honest updates and clear action plans.

Practical Principles Any Team Can Use

Start with clarity. When value and offerings are clear, doubt decreases. Next, reduce friction. Limit fields, request only necessary data, and organize steps logically. Strengthen safeguards with technical and manual reviews. Clarify final costs and automate receipts.

Respect privacy. Separate marketing consent and avoid collecting excessive personal details. Prepare for traffic surges. Test system limits before big announcements. Most importantly, measure and improve. Regular data review and user feedback drive better outcomes.

Cultivating Organizational Trust

Technology is only part of the solution. When your team understands data safety and privacy, operations improve. Provide regular training. Teach how to resolve complaints, report suspicious activity, and respond to privacy concerns. Assign clear ownership of each step from the landing page to badge printing.

Adapting to Languages and Markets

A single version won’t suit all global audiences. Translate carefully. Avoid complex technical terms. Format dates, addresses, and numbers based on region. Support local payment methods. For time zones, show both local and event times to reduce confusion.

Supporting Online and Hybrid Formats

In online and hybrid setups, tickets include access links. Secure them with per-attendee tokens. Limit simultaneous logins for sensitive sessions. Provide a test room and guide ahead of time. For hybrid events, explain the differences in access for virtual vs. on-site attendees. Outline change policies for those shifting formats.

Managing Capacity, Waitlists, and Changes

If seating is limited, display real-time counts. When full, show the waitlist and how invites are sent. When unexpected changes happen, send concise updates to affected participants. Offer alternate sessions or replays if possible. Use time-limited holds on workshop slots to avoid monopolization.

Choosing Scalable Tech and Architecture

Select platforms with audit logs, flexible field builders, and strong APIs. Modular systems adapt better to new tools. Avoid vendor lock-in unless necessary. Define data retention and deletion policies early. With a strong foundation, you’ll handle growth and regulation changes more easily.

Ethical Communication and Transparency

Be truthful about seat limits, attendee experience, and any recording plans. Don’t use misleading countdowns unless seats are actually expiring. Keep emails short and clear. Avoid excessive reminders or fear-based messaging. Aim for peace of mind, not pressure.

Common Pitfalls and Fixes

One common error is overloading the first page. Fix it by splitting forms and prioritizing key fields. Another is unclear pricing. Add cost summaries before payment and use tooltips to explain. Time zone issues? Send proper iCal and Google Calendar files. Weak post-payment communication? Create helpful email sequences with next steps and contact info.

Maintaining Post-event Relationships

Trust doesn’t end with the final session. Send thank-you emails and short feedback forms. Share materials if allowed. Explain how users can delete or export their data. Proper aftercare builds loyalty and referrals.

Thoughtful registration isn’t magic. It’s a series of people-centered decisions that respect data, save time, and build trust. When the process flows well from first click to confirmation, trust grows and with it, stronger attendance and better experiences for everyone.

Best Seating Arrangements for Interactive Conferences

Best Seating Arrangements for Interactive Conferences

Choosing the right seating layout helps create a space where dialogue flows, ideas emerge easily, and every message is clearly delivered. Whether hosting a gathering in Berlin, São Paulo, or Dubai, organizers often face the same challenge: How can seat placement improve communication and encourage active participation?

At a Glance

This article explores seven proven seating arrangements tested across continents. Each style offers a unique dynamic from the focused engagement of a U-shape to the full-circle energy of theater in the round.After considering key factors such as event goals, group size, and available technology, you’ll learn how to choose or even combine seating layouts to deliver the best results for your next conference.

Why Seating Layout Matters in Conference Success

Event planners in London, Seoul, and Nairobi understand that a strong agenda isn’t enough. If the space creates barriers between the speaker and attendees, conversations quickly stall. A well-designed seating plan brings voices together, reduces anxiety, and encourages questions. Delegates at a global climate summit, for instance, are more engaged when chairs are close and the sightlines are clear.

Cultural preferences also shape layout decisions. Some countries favor wider spacing to reflect respect for personal boundaries. Others embrace tighter, more collaborative arrangements. Though it may seem like a small detail, chair placement sets the foundation for a successful experience.

Core Considerations When Choosing a Layout

Before selecting a layout, ask these four questions:

  • Group size: How many attendees are expected? Larger groups require clear visibility throughout the room.
  • Interaction type: Is the session focused on open discussions, workshops, or keynote presentations?
  • Technology in use: Will there be digital polling, live whiteboards, or just microphones?
  • Session flow: How often will participants switch from plenary to breakout rooms? Smooth transitions are essential.

These questions help narrow your choices and ensure the layout supports both content and comfort.

U-shape: Best for Active Discussion

In a U-shape arrangement, everyone faces inward toward a central space. The room feels like a single, unified table. Popular for corporate strategy sessions in New York and Tokyo, this setup allows quick idea exchanges. With an expert at the center, raising hands and asking questions comes naturally. It works well for up to 25 participants without losing focus on the speaker.

However, visibility can be a concern. If the sides of the U are too long, those at the ends may struggle to see projected content. This can be solved with multiple screens or omni-directional microphones. Overall, the U-shape fosters a strong sense of teamwork and open dialogue.

Cabaret Style: Great for Small Group Collaboration

Favored by event planners in Paris and Toronto, the cabaret layout suits hands-on sessions. Five or six people sit at a semi-circular table facing the stage. With no chairs blocking the view, it’s easy to engage with others.

Research from the International Association of Events Managers showed an 18% increase in self-reported participation in cabaret settings compared to traditional classrooms.

It also reduces microphone feedback since the last row is closer to the speaker. For long group exercises like product development, this setup offers comfort and connection. Just ensure aisle space is wide enough for staff and AV teams to move freely.

Classroom Style: Balanced Listening and Engagement

This layout isn’t just for lectures. At the recent Singapore Tech Summit, rows of chairs paired with small tables allowed participants to take notes or work on laptops. It’s especially useful when alternating between presentations and Q&A sessions.

Three benefits stand out: clear view of the stage, enough space for devices and materials, and flexibility to move during breakouts. If high participation is a goal, assign roaming moderators to ensure everyone has a voice.

Cluster Pods: Designed for Co-Creation

Picture five round tables spaced out in a spacious venue in Sydney. Each pod seats six to eight delegates with its own flip chart and tablet stand. This setup shines in design-thinking workshops. Teams exchange ideas within their pod before sharing with the larger group.

Sound management is key here. If all pods speak at once, it can overwhelm the room. Directional speakers or soft partitions can help reduce audio crossover. After each round, team leaders can rotate between pods to spread fresh perspectives. This technique, known as “fishbowl rotation” in Scandinavia, adds energy and diversity to discussions.

Theater in the Round: Deep Immersion

If the goal is total engagement, theater in the round is a proven choice for leadership forums in Chicago and Johannesburg. The speaker stands in the center, surrounded by circular seating. With few people behind others, expressions are visible and interactions feel genuine.

This layout creates a sense of inclusion for everyone seems part of the action. At a global health forum, participants said the format made discussions feel authentic and alive. Speakers rotated around the circle, making eye contact with all. To keep things running smoothly, use wireless in-ear monitors and adjust lighting to avoid glare on those facing the spotlight.

Flexible Zones: Combining Multiple Layouts

At large events like those at the Las Vegas Convention Center, it’s common to divide a space into zones: plenary, breakout, and networking areas. The plenary section may begin with a classroom setup and shift to theater in the round later in the day for a panel debate. Breakout areas might use pods or cabaret style.

Success depends on quick setup changes. Crews must reset tables and chairs within 15 minutes. Modular furniture and mobile stages help maintain timing. Switching up layouts can keep participants energized especially at multi-day conferences.

Integrating Seating with Technology

High-definition LED walls and real-time translation systems are now standard at major conferences. The challenge is matching the seating layout with the technology in use. At a hybrid event in Vancouver, the organizer chose a U-shape for in-person attendees and surrounded them with large screens displaying virtual participants in gallery view.

When layouts align with strong Wi-Fi and noise-canceling microphones, latency drops and everyone’s voice is equally heard on-site or online. A well-chosen layout complements digital tools and improves the hybrid experience.

Estimating Costs Effectively

Each option carries its own expenses. Theater in the round requires extra lighting and multi-directional sound. Cluster pods need more tables and writing kits. To avoid budget surprises, use a cost matrix that includes furniture rental, crew support, and setup time. Veteran planners in Frankfurt recommend modular furniture rentals over custom builds to save costs.

Accurate forecasting leads to a balanced experience spending wisely without sacrificing interaction quality.

A Glimpse of the Future

Trial events in Stockholm and Tel Aviv are testing AI-assisted seat tracking that counts empty chairs and suggests shifts to fill front rows. Some sensors also measure how much conversation occurs in different areas of the room to identify quieter zones.

Though still developing, these tools suggest a shift toward data-driven seating management. In the next decade, seating may become more personalized. Delegates could scan a badge and receive seat suggestions via app perhaps closer to an interpreter booth for multilingual participants.

Getting Started with Your Event

Every successful arrangement begins with a clear objective. Ask yourself: “What should this conference accomplish?” Once the goal is defined, choose the most fitting layout. Don’t forget to collect feedback after the event. Ask attendees if the seating felt comfortable. Next time, you can fine-tune the aisle spacing, stage height, or monitor count based on their input.

Thoughtful seating arrangements are the quiet foundation of a great conference. When done right, they help ideas move freely and bring people closer, no matter where they come from. Begin with a clear goal, respect cultural nuances and tech needs, and let the chairs quietly support meaningful conversation.